自分でオリジナルのアプリを作る際の基本!新しい画面の作り方を体験してみましょう。
このやり方を覚えると、好きなだけ画面を作ってアプリを拡張していくことができるようになります!
実践1.ボタンの追加と画面遷移
1.新しい画面の作成
まずは新しい画面を作ります。
「app > java > me.picnicapp.sample.picnicsample」で右クリックし、
「New > Activity > Empty Activity」を選びます。 「Activity Name」を「TameshiActivity」に変更します。
すると、「Layout Name」も自動的に書き換わります。
※「Generate Layout File」はONのままに、「Rauncher Activity」はOFFのままにしましょう。
Finishボタンを押します。 「app > java > me.picnicapp.sample.picnicsample」に TameshiActivity が、
「app > res > layout」に activity_tameshi.xml が追加されました。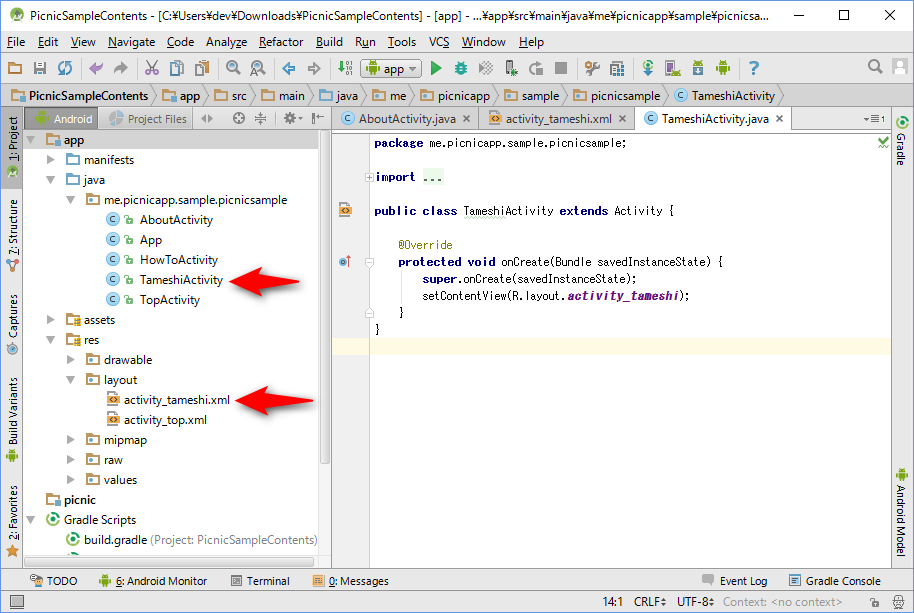 「app > manifest > AndroidManifest.xml」を開きます。
これはマニフェストファイルと呼ばれるもので、Androidアプリのプロジェクトには必ずマニフェストファイルが1つ存在しています。
このファイルは、アプリの名前やアイコン、どのような機能を使うか、どのような画面を有しているか、等のアプリに関する様々な情報を書いておくためのファイルです。
マニフェストファイルの下の方に、TameshiActivity に関する記述が自動的に追加されています。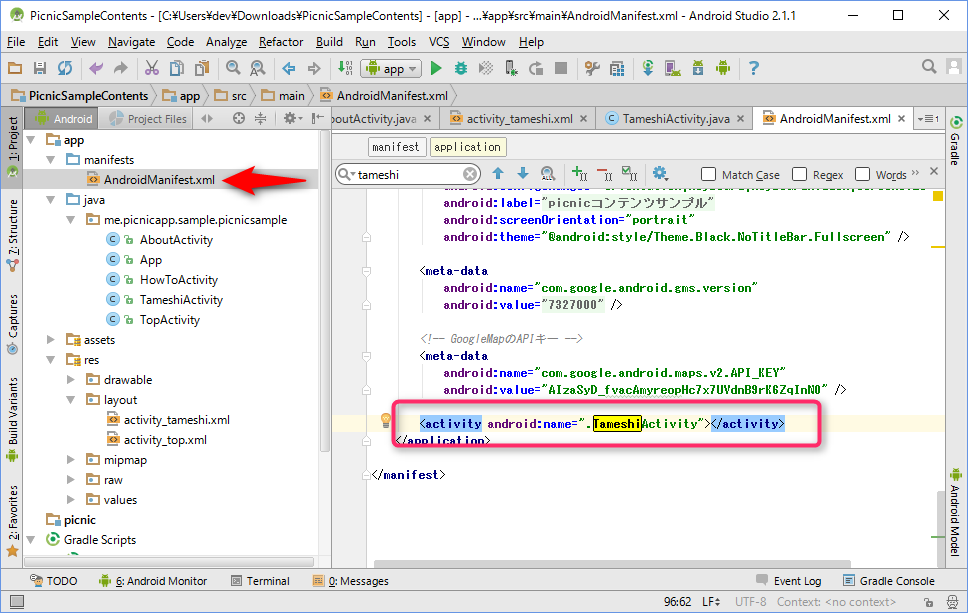 TameshiActivity に関する記述を、次のように書き換えます。
「app > java > me.picnicapp.sample.picnicsample」で右クリックし、
「New > Activity > Empty Activity」を選びます。
「Activity Name」を「TameshiActivity」に変更します。すると、「Layout Name」も自動的に書き換わります。
※「Generate Layout File」はONのままに、「Rauncher Activity」はOFFのままにしましょう。
Finishボタンを押します。
「app > java > me.picnicapp.sample.picnicsample」に TameshiActivity が、「app > res > layout」に activity_tameshi.xml が追加されました。
「app > manifest > AndroidManifest.xml」を開きます。これはマニフェストファイルと呼ばれるもので、Androidアプリのプロジェクトには必ずマニフェストファイルが1つ存在しています。
このファイルは、アプリの名前やアイコン、どのような機能を使うか、どのような画面を有しているか、等のアプリに関する様々な情報を書いておくためのファイルです。
マニフェストファイルの下の方に、TameshiActivity に関する記述が自動的に追加されています。
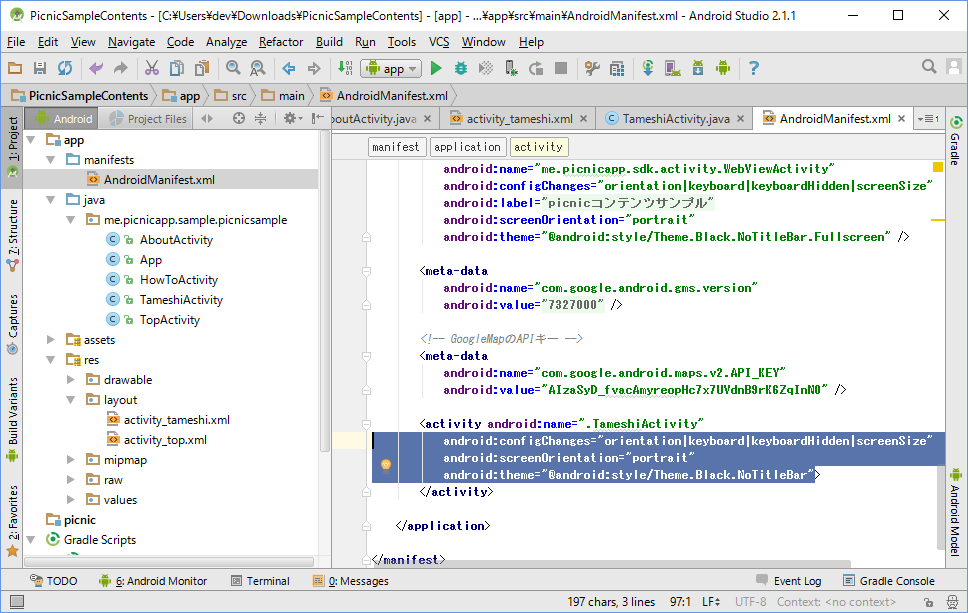
TameshiActivity に関する記述を、次のように書き換えます。
<activity android:name=".TameshiActivity"
    android:configChanges="orientation|keyboard|keyboardHidden|screenSize"
    android:screenOrientation="portrait"
    android:theme="@android:style/Theme.Black.NoTitleBar">
</activity>
TameshiActivity のactivityノードに追加した属性については、以下の通りです。
-
configChanges:
画面の状態変化に関する設定です。詳しくは調べてみましょう。「⇒configChanges」 -
screenOrientation:
画面の対応向きを指定します。portraitを指定すると縦向きのみ対応の画面となり、端末を横にしても画面の向きは縦で固定されたままになります。landscapeを指定すると横向き固定の画面になります。
指定しない場合は縦横両方に対応の画面となり、端末の向きに合わせて画面の向きも切り替わります。 -
theme:
画面の見た目のテーマを指定します。
何も指定しない場合、画面上部に「通知バー」と「タイトルバー」が表示されます。
今回は「通知バー」のみを表示させたいので、「@android:style/Theme.Black.NoTitleBar」というテーマを設定します。
※他にも様々なテーマが存在します。自分でオリジナルのテーマを作ることもできます。詳しくは調べてみましょう。「⇒テーマ」
2.新しい画面に移動するためのボタンをUIに追加
TOP画面のUIに、新しい画面に移動するためのボタンを追加してみましょう。
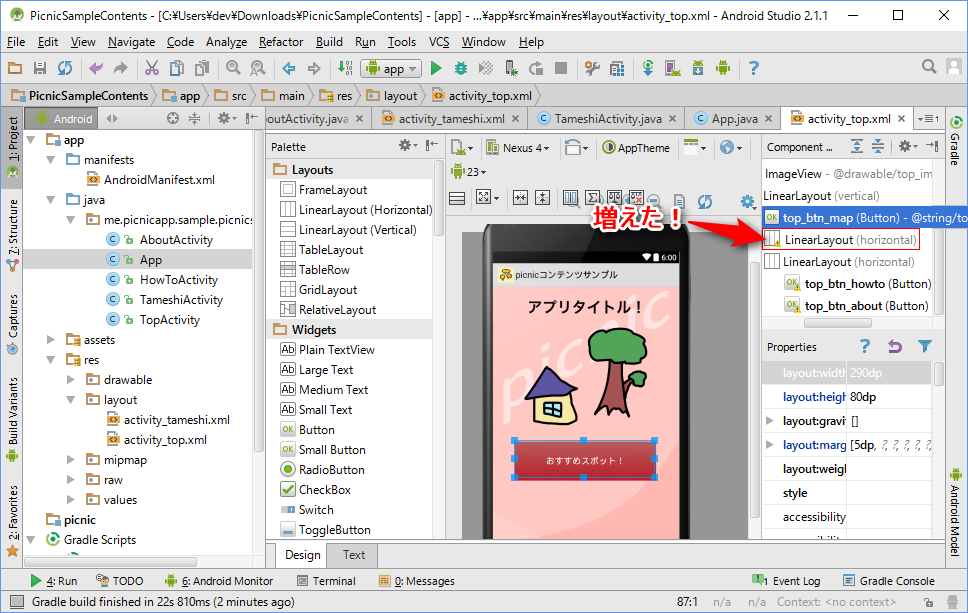
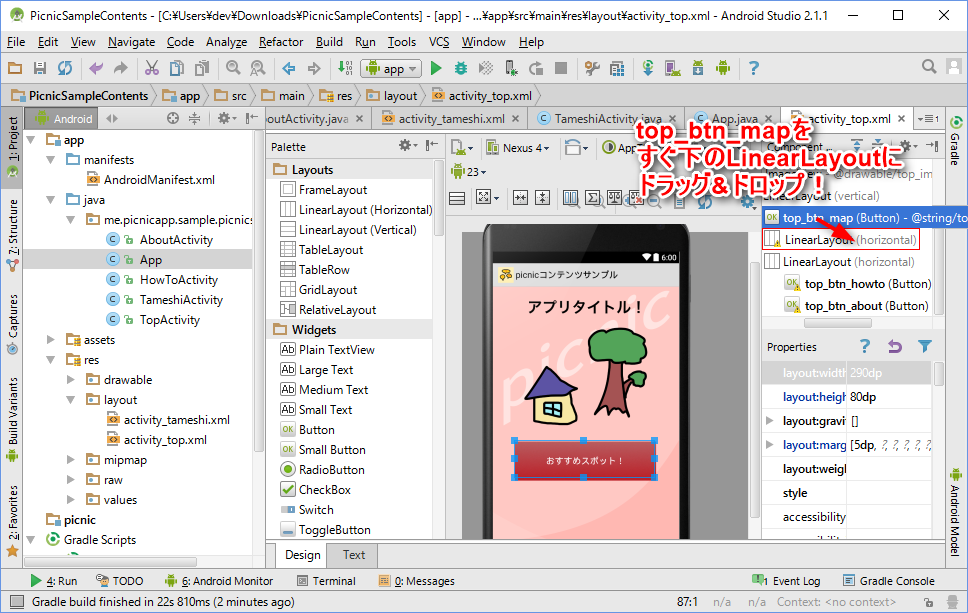
まずは「app > res > layout > activity_top.xml」を選びます。 「Layouts」内にある「LinearLayout(Horizontal)」を、「top_btn_map」の下にドラッグ&ドロップします。
 このように、「top_btn_map」の下に「LinearLayout」が増えます。
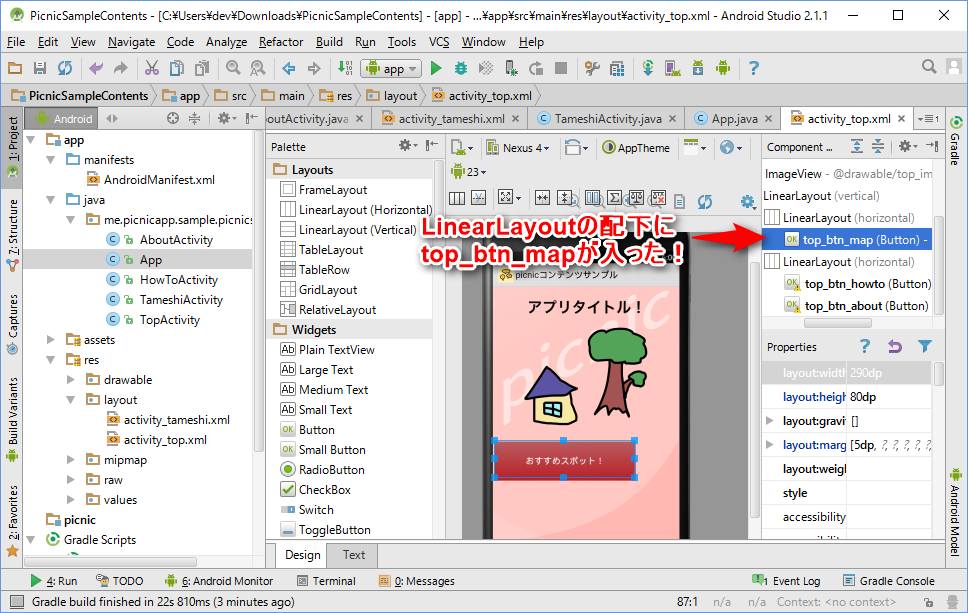
 次に「top_btn_map」を、新しく追加された「LinearLayout」に対してドラッグ&ドロップを行います。
 このように、新しく追加された「LinearLayout」の配下に「top_btn_map」が入ります。
現時点で、ツリーの階層構造は以下のようになっています。
※もしなっていない場合は、ドラッグ&ドロップに失敗しています。
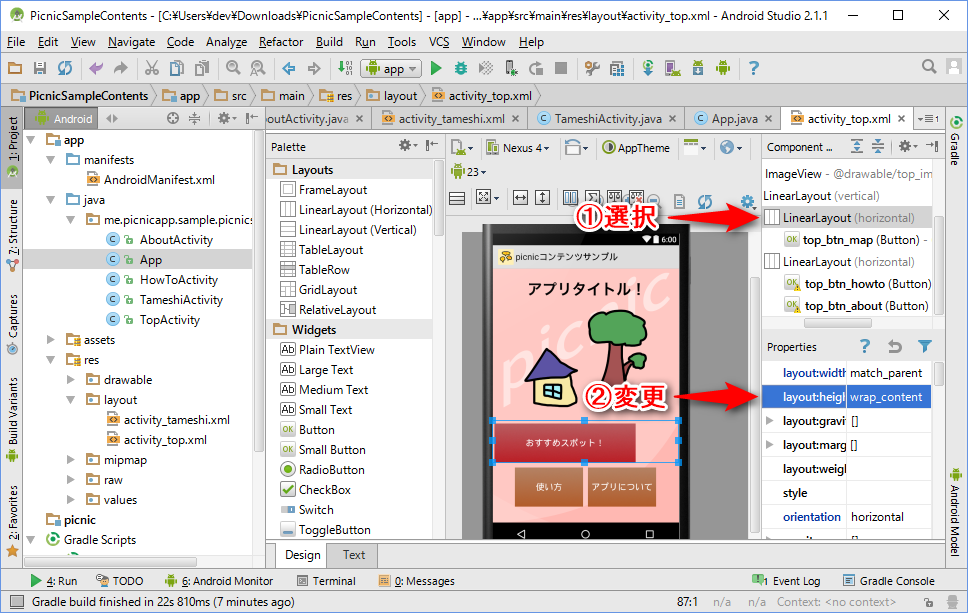
 追加した LinearLayout の Properties で、「layout:height」を「wrap_content」に変更します。
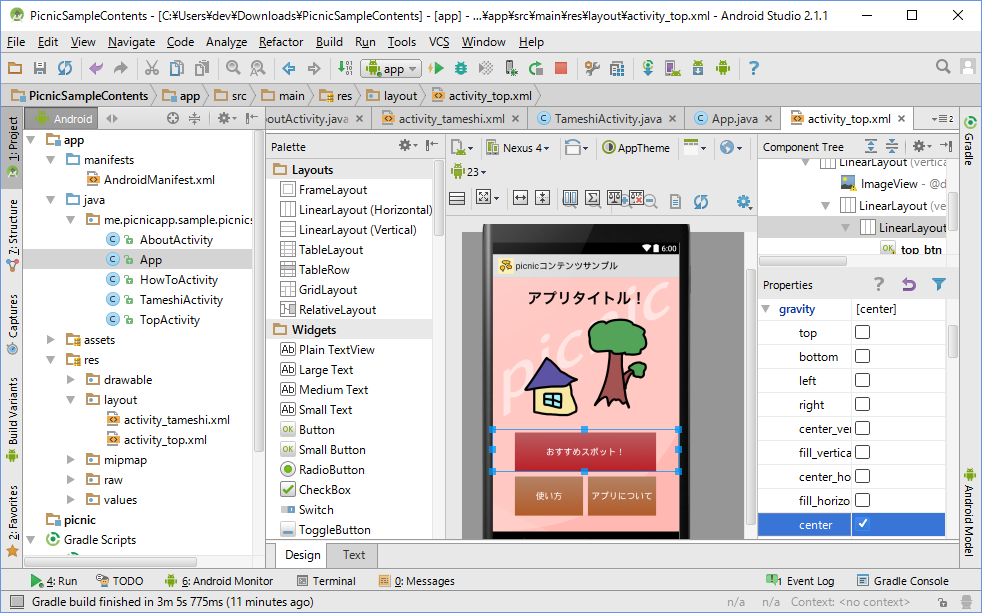
 次に、LinearLayout の「gravity > center」をONに変更します。
 LinearLayout の配下に、もう一つボタンを追加します。
「Widgets」内の「Button」を、「top_btn_map」の下にドラッグ&ドロップします。
※このボタンを、新しい画面に移動するためのボタンにします。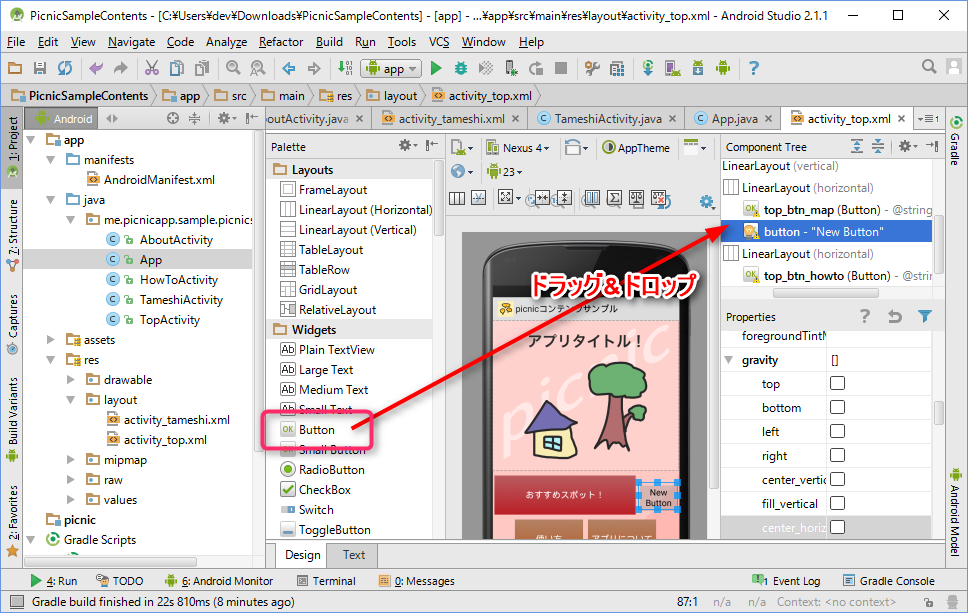 ボタンをレイアウトを整えていきます。
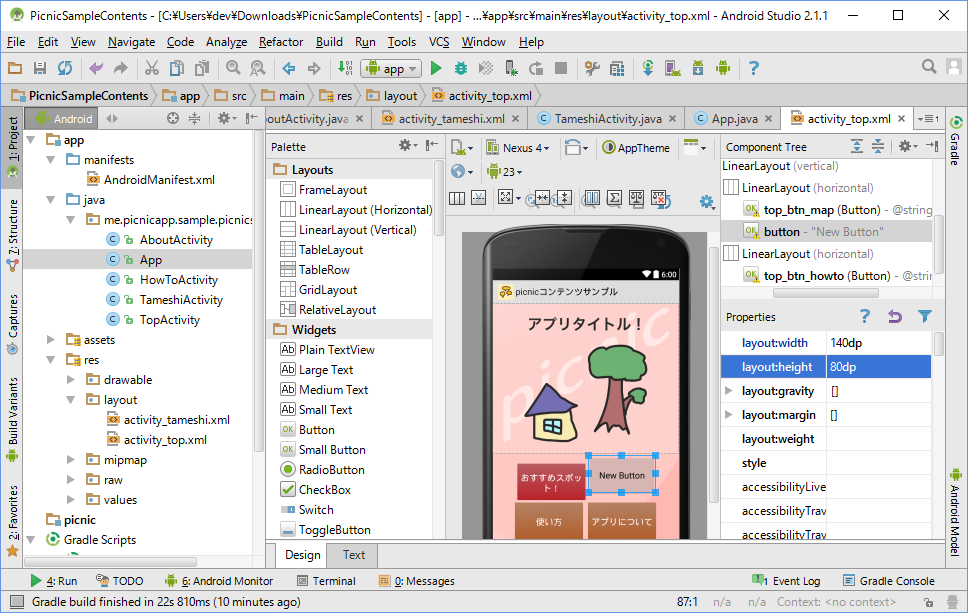
「top_btn_map」を選択し、Properties の「layout:width」を「140dp」に変更します。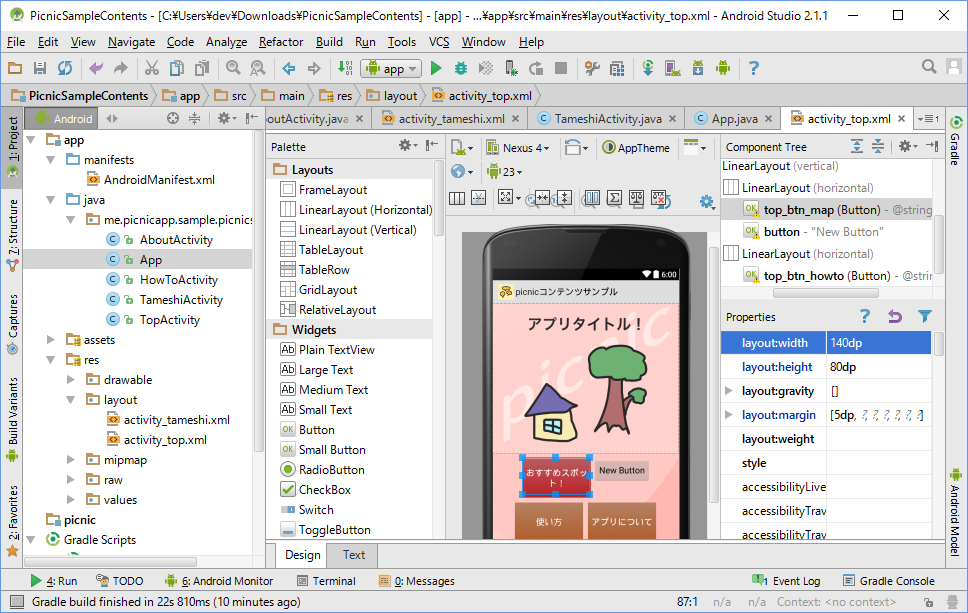 次に、先ほど追加したボタンを選択し、Properties の「layout:width」を「140dp」に、「layout:height」を「80dp」にそれぞれ変更します。
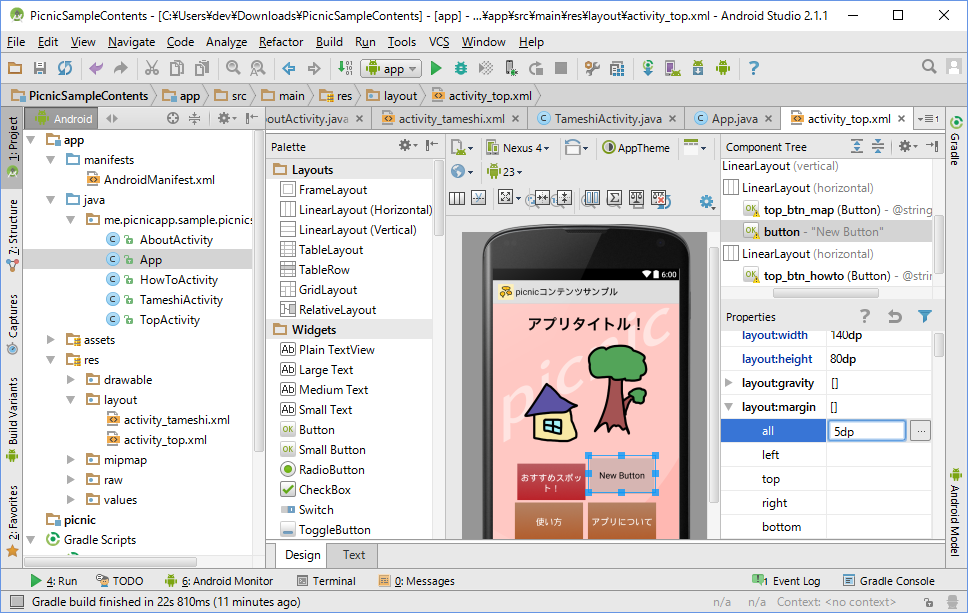
 先ほど追加したボタンの「layout:margin > all」を「5dp」に変更します。
 先ほど追加したボタンの「textSize」を「18sp」に変更します。
※「dp」ではなく「sp」です。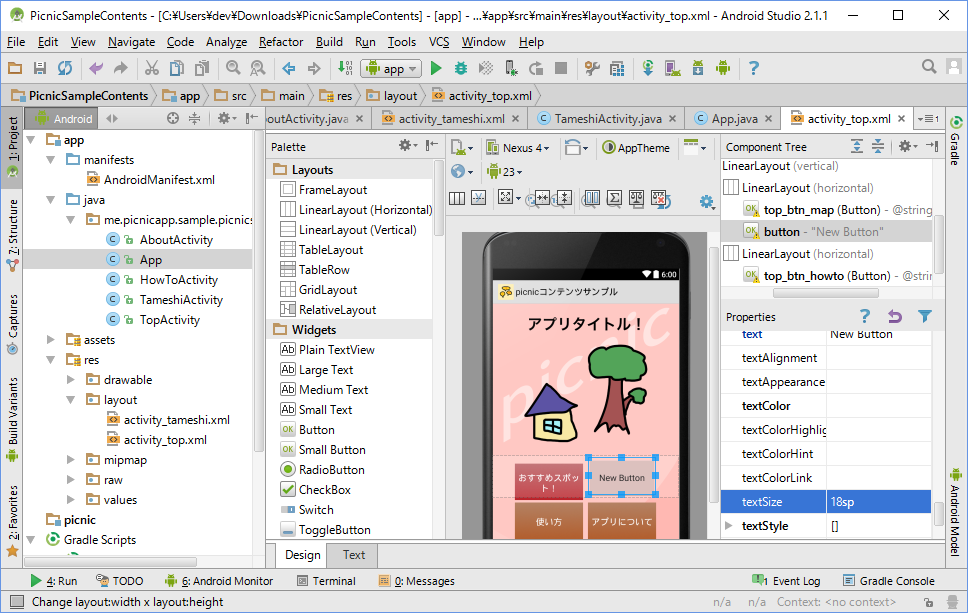 先ほど追加したボタンの「background」を選び、右側の参照ボタンをクリックします。
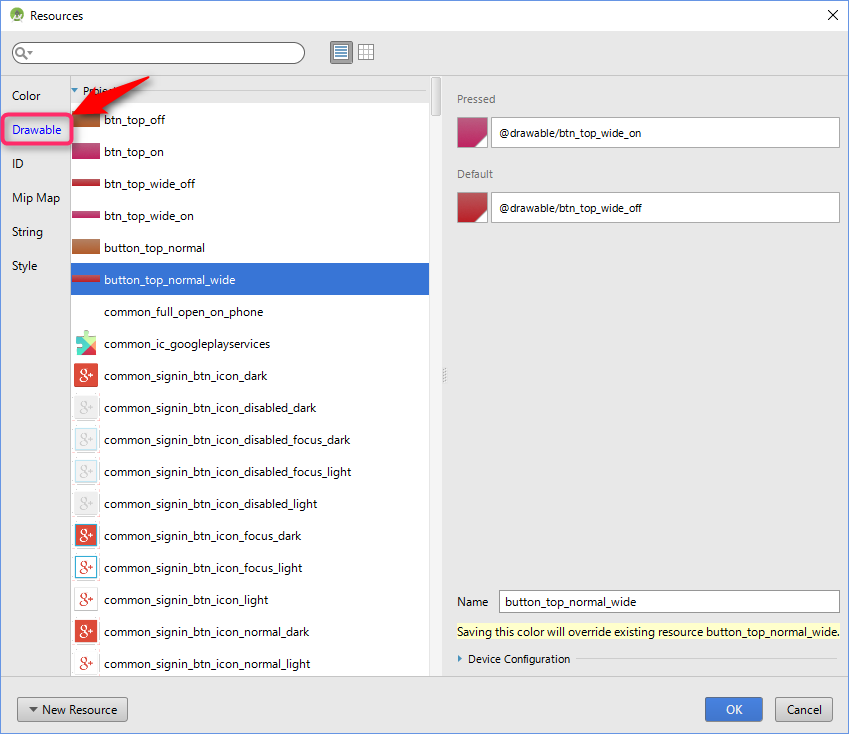
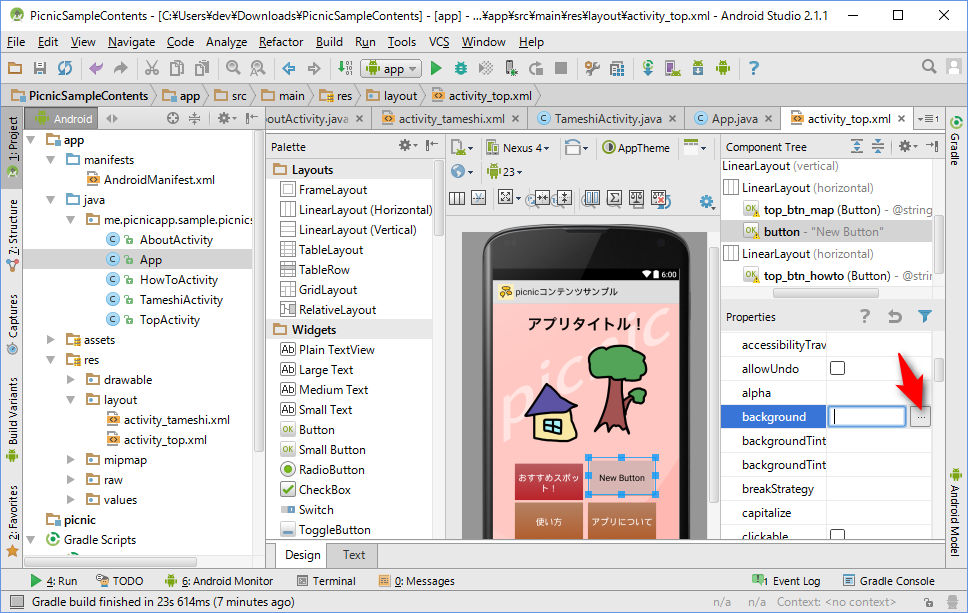 リソースの選択画面が出てくるので、画面左の「Drawable」から「button_top_normal_wide」を選び、OKボタンを押します。
 先ほど追加したボタンの「textColor」を「#fff」に変更します。
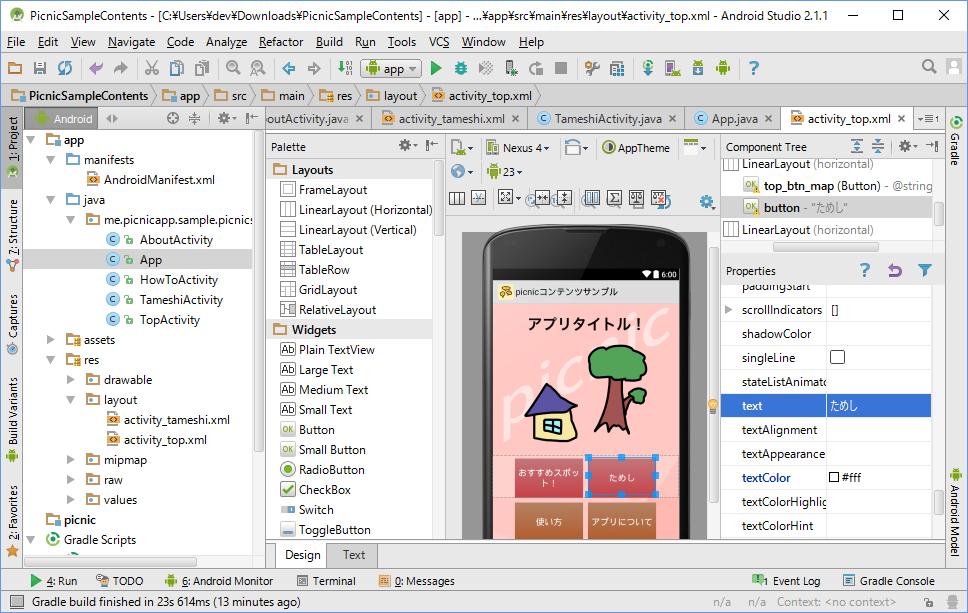
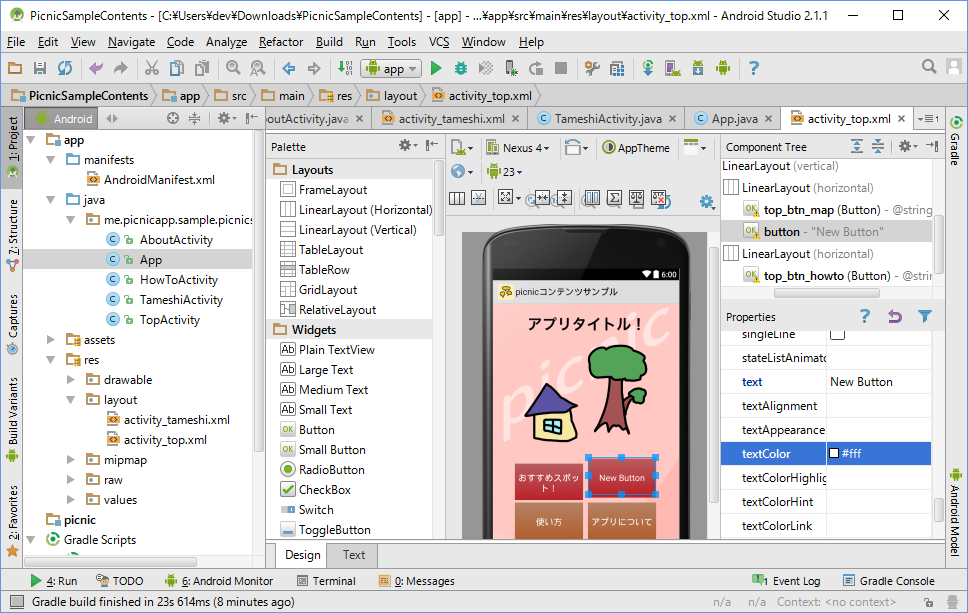 先ほど追加したボタンの「text」を「ためし」に変更します。
 先ほど追加したボタンの「id」を「top_btn_tameshi」に変更します。
ここまで設定をしたら左下の方を確認し、現在選択されている「Design」タブから「Text」タブに変更します。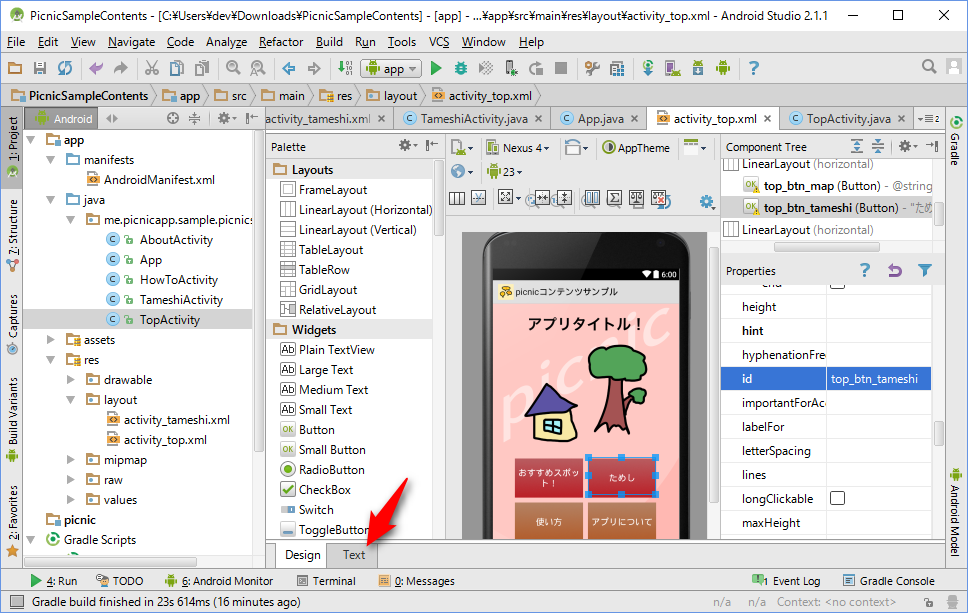 AndroidのUIは、内部的にはXMLで記述されています。
「android:id」が「@+id/top_btn_tameshi」になっている「Button」ノードを探します。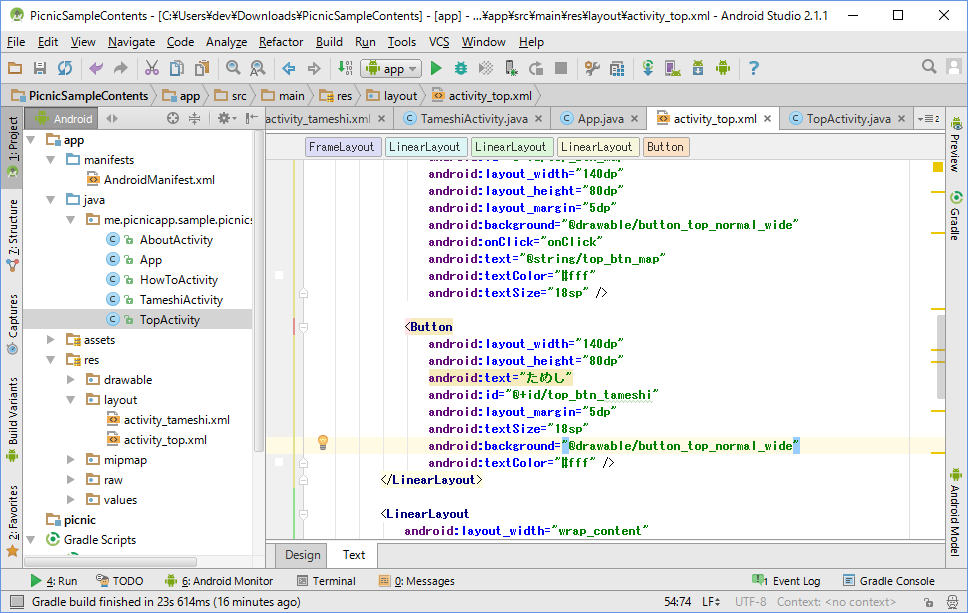 「android:onClick="onClick"」を追加します。
これで、TOP画面のデザイン変更は終わりです。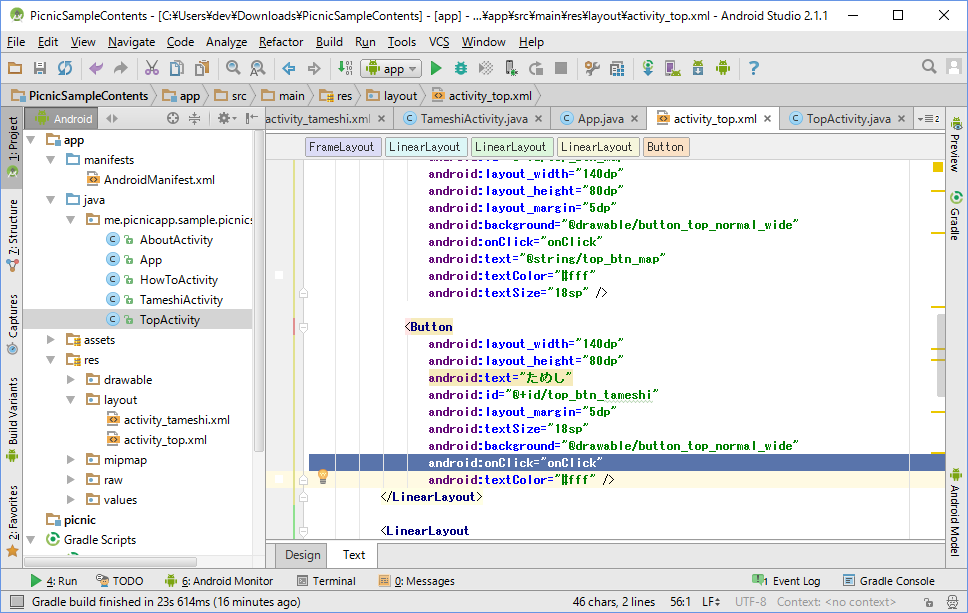 完成形のXMLの中身は下記です。コピペするのではなく、自分の作ったものとdiffで確認してみましょう。
まずは「app > res > layout > activity_top.xml」を選びます。
「Layouts」内にある「LinearLayout(Horizontal)」を、「top_btn_map」の下にドラッグ&ドロップします。
このように、「top_btn_map」の下に「LinearLayout」が増えます。
次に「top_btn_map」を、新しく追加された「LinearLayout」に対してドラッグ&ドロップを行います。
このように、新しく追加された「LinearLayout」の配下に「top_btn_map」が入ります。現時点で、ツリーの階層構造は以下のようになっています。
※もしなっていない場合は、ドラッグ&ドロップに失敗しています。
Device Screen
    FrameLayout
        ImageView
        LinearLayout
            ImageView
            LinearLayout
                LinearLayout
                    top_btn_map
                LinearLayout
                    top_btn_howto
                    top_btn_about
追加した LinearLayout の Properties で、「layout:height」を「wrap_content」に変更します。
次に、LinearLayout の「gravity > center」をONに変更します。
LinearLayout の配下に、もう一つボタンを追加します。「Widgets」内の「Button」を、「top_btn_map」の下にドラッグ&ドロップします。
※このボタンを、新しい画面に移動するためのボタンにします。
ボタンをレイアウトを整えていきます。「top_btn_map」を選択し、Properties の「layout:width」を「140dp」に変更します。
次に、先ほど追加したボタンを選択し、Properties の「layout:width」を「140dp」に、「layout:height」を「80dp」にそれぞれ変更します。
先ほど追加したボタンの「layout:margin > all」を「5dp」に変更します。
先ほど追加したボタンの「textSize」を「18sp」に変更します。※「dp」ではなく「sp」です。
先ほど追加したボタンの「background」を選び、右側の参照ボタンをクリックします。
リソースの選択画面が出てくるので、画面左の「Drawable」から「button_top_normal_wide」を選び、OKボタンを押します。
先ほど追加したボタンの「textColor」を「#fff」に変更します。
先ほど追加したボタンの「text」を「ためし」に変更します。
先ほど追加したボタンの「id」を「top_btn_tameshi」に変更します。ここまで設定をしたら左下の方を確認し、現在選択されている「Design」タブから「Text」タブに変更します。
AndroidのUIは、内部的にはXMLで記述されています。「android:id」が「@+id/top_btn_tameshi」になっている「Button」ノードを探します。
「android:onClick="onClick"」を追加します。これで、TOP画面のデザイン変更は終わりです。
完成形のXMLの中身は下記です。コピペするのではなく、自分の作ったものとdiffで確認してみましょう。
<FrameLayout xmlns:android="http://schemas.android.com/apk/res/android"
    android:layout_width="match_parent"
    android:layout_height="match_parent">

    <ImageView
        android:layout_width="match_parent"
        android:layout_height="match_parent"
        android:scaleType="centerCrop"
        android:src="@drawable/top_bg" />

    <LinearLayout
        android:layout_width="match_parent"
        android:layout_height="match_parent"
        android:orientation="vertical">

        <ImageView
            android:layout_width="match_parent"
            android:layout_height="match_parent"
            android:layout_weight="0.4"
            android:scaleType="fitCenter"
            android:src="@drawable/top_image" />

        <LinearLayout
            android:layout_width="match_parent"
            android:layout_height="match_parent"
            android:layout_weight="0.6"
            android:gravity="center_horizontal"
            android:orientation="vertical">

            <LinearLayout
                android:orientation="horizontal"
                android:layout_width="match_parent"
                android:layout_height="wrap_content"
                android:gravity="center">

                <Button
                    android:id="@+id/top_btn_map"
                    android:layout_width="140dp"
                    android:layout_height="80dp"
                    android:layout_margin="5dp"
                    android:background="@drawable/button_top_normal_wide"
                    android:onClick="onClick"
                    android:text="@string/top_btn_map"
                    android:textColor="#fff"
                    android:textSize="18sp" />

                <Button
                    android:layout_width="140dp"
                    android:layout_height="80dp"
                    android:text="ためし"
                    android:id="@+id/top_btn_tameshi"
                    android:layout_margin="5dp"
                    android:textSize="18sp"
                    android:background="@drawable/button_top_normal_wide"
                    android:onClick="onClick"
                    android:textColor="#fff" />
            </LinearLayout>

            <LinearLayout
                android:layout_width="wrap_content"
                android:layout_height="wrap_content"
                android:orientation="horizontal">

                <Button
                    android:id="@+id/top_btn_howto"
                    android:layout_width="140dp"
                    android:layout_height="80dp"
                    android:layout_margin="5dp"
                    android:background="@drawable/button_top_normal"
                    android:onClick="onClick"
                    android:text="@string/top_btn_howto"
                    android:textColor="#fff"
                    android:textSize="18sp" />

                <Button
                    android:id="@+id/top_btn_about"
                    android:layout_width="140dp"
                    android:layout_height="80dp"
                    android:layout_margin="5dp"
                    android:background="@drawable/button_top_normal"
                    android:onClick="onClick"
                    android:text="@string/top_btn_about"
                    android:textColor="#fff"
                    android:textSize="18sp" />

            </LinearLayout>
        </LinearLayout>
    </LinearLayout>

</FrameLayout>
3.新しい画面に移動するための処理を実装
「app > java > me.picnicapp.sample.picnicsample > TopActivity」を選びます。
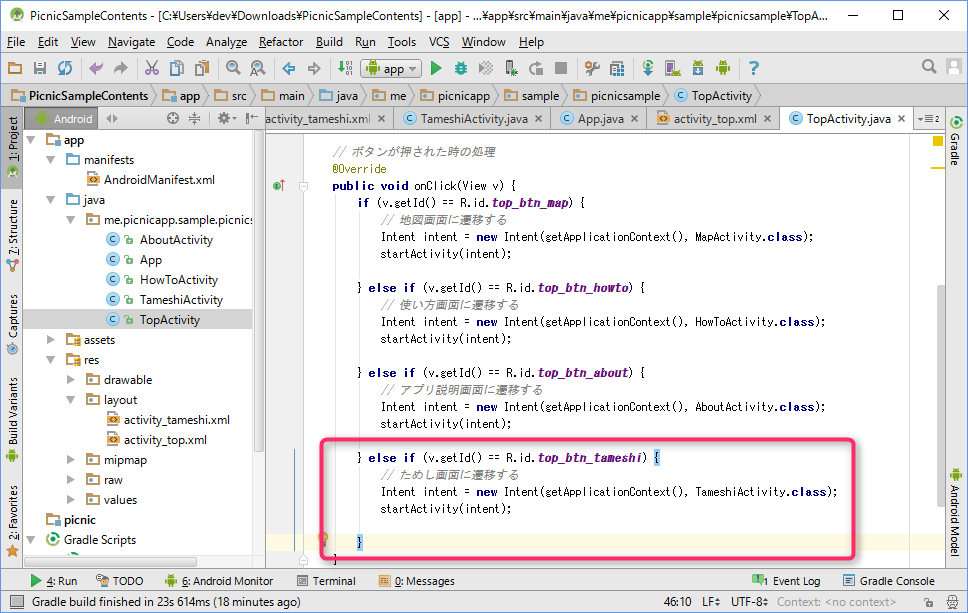
Activity 内の onClick メソッドを探します。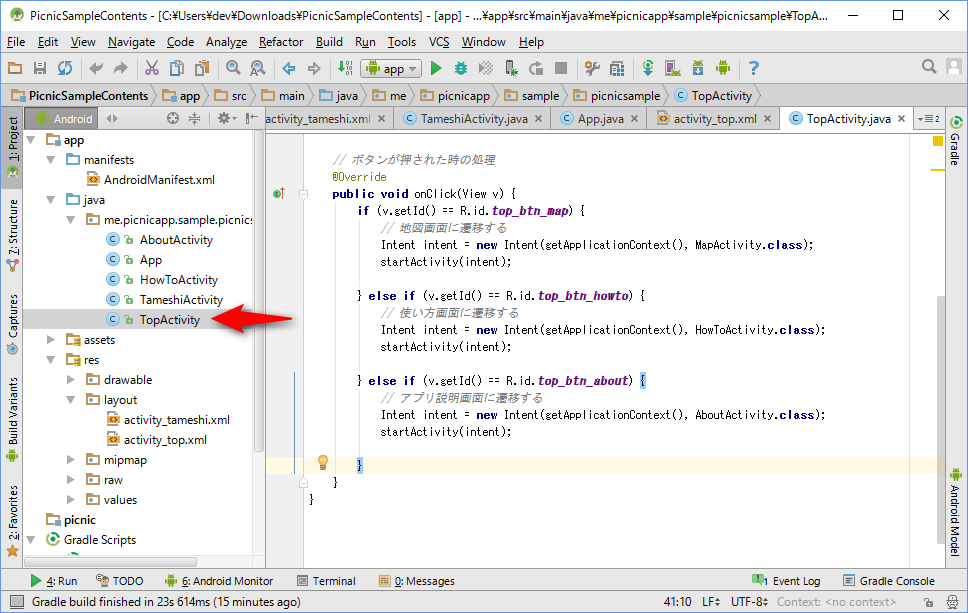 画面内のボタンが押された時の条件判断に、以下の分岐を追加します。
Activity 内の onClick メソッドを探します。
画面内のボタンが押された時の条件判断に、以下の分岐を追加します。
else if (v.getId() == R.id.top_btn_tameshi) {
    // ためし画面に遷移する
    Intent intent = new Intent(getApplicationContext(), TameshiActivity.class);
    startActivity(intent);

}
4.新しい画面のデザインを変更する
「app > res > layout > activity_tameshi.xml」を選びます。
「RelativeLayout」の Properties の「background」を「#f00」に変更します。 これで手順は全て終了です。
実際にアプリを実行して動作を確認してみましょう!
「RelativeLayout」の Properties の「background」を「#f00」に変更します。
これで手順は全て終了です。実際にアプリを実行して動作を確認してみましょう!
